Team Dashboard

warning

Some of this may or may not be applicable to the version that is installed on the site you are working on. So please be aware that this is still a work in progress.

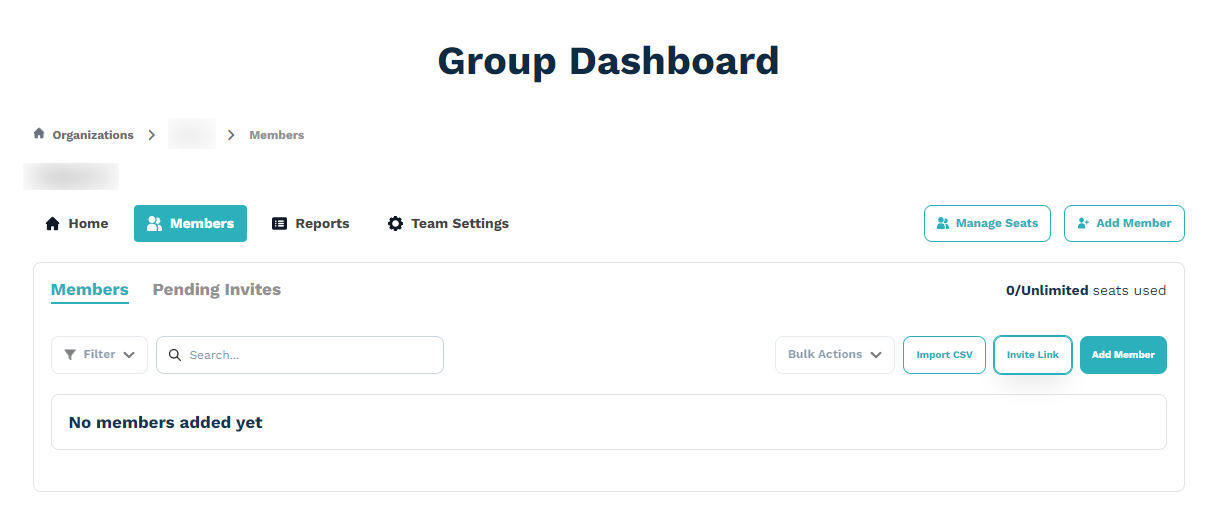
MemberSync has integrated a few features from Teams for Woo directly to the Teams Dashboard to make management easier. Group-Dashboard-Org Dashboard

On the left there will be a Manage Seats and Add Member buttons for quick access.

Quick Access

Manage Seats

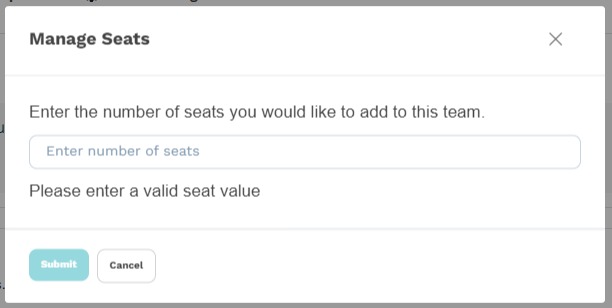
The Manage Seats button will be available if the Teams does not have Unlimited Seat Count which is possible to happen when the Teams is set up manually. This button will open a Modal that will allow a user to purchase additional seats. Group-Dashboard-Manage Seats Modal
info

Some validations may apply for Adding Seats based on the Team Membership set up of the Product if there is a maximum and/or minimum member count as well as the value of the Seat Count on the Teams that has been previous bought if there are any.

Add Members

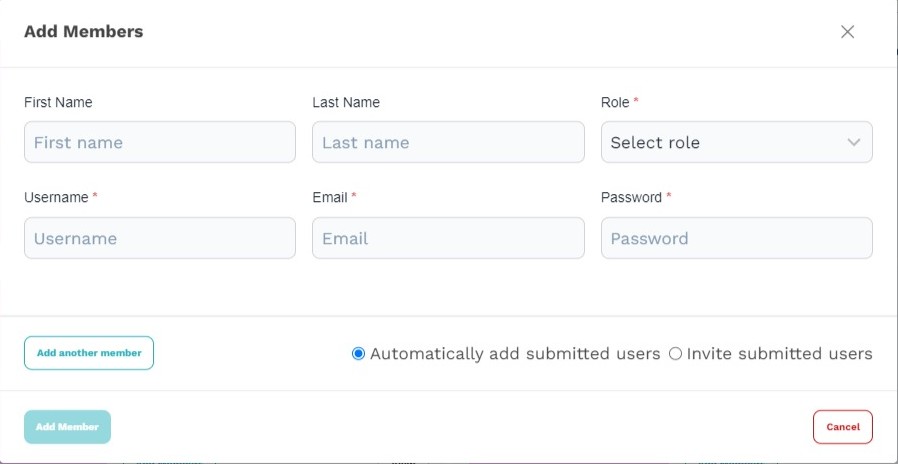
The Add Members button will open a Modal that will allow a user to add a member's details. Check out the Add Members section for more details. Add Member Modal
Tab Navigation

To the right you will find a Home Tab, Members Tab, Reports Tab and Team Settings Tab.

Home Tab

The Home tab would display different panels that will provide quick access to the other Tabs for management features. The Group Panel will let you View the Group as well as display the Group Name and a quick overview of the Members and Leaders if there is a Synced Group with the Team. Then Members Panel that shows the number of Total Members as well as allows you to Manage Members and Add Member quickly. The Reports Panel will give direct access to the Reports Tab. The Team Setting Panel will give direct access to the Team Setting tab. Group Dashboard
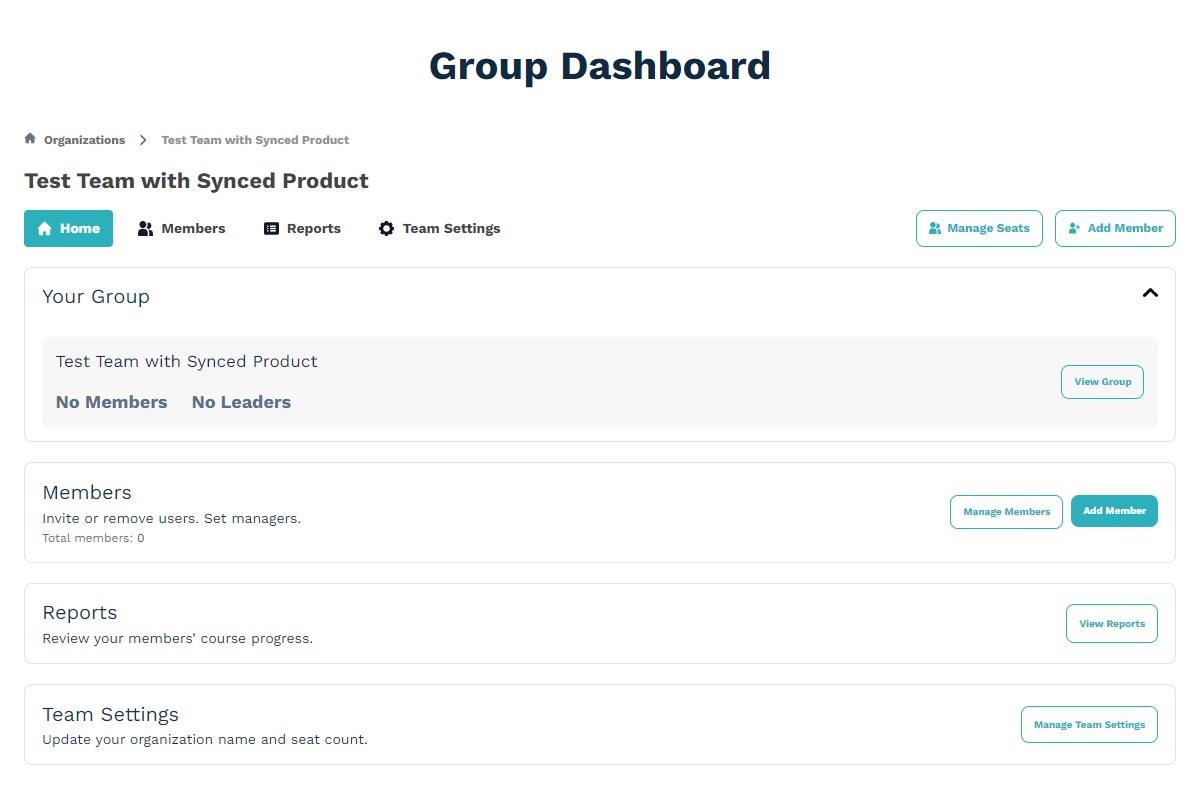
These panels can be customized by showing or hiding them and editing their descriptions via adding the following attributes to the shortcode:

  • show_home_panel_members = true/false
  • show_home_panel_reports = true/false
  • show_home_panel_settings = true/false
  • home_panel_members_description = "Invite or remove users. Set managers."
  • home_panel_reports_description = "Review your members’ course progress."
  • home_panel_settings_description = "Update your organization name and seat count"
  • show_home_manage_seats_nav_button = true/false
  • show_home_add_member_nav_button = true/false
  • show_home_reporting_groups = true/false

An example application of this would be using [membersync-group-dashboard-content show_home_panel_members=true home_panel_members_description="Member Description"]

Members Tab

The Members tab is further divided into the right and left side, include two sub tab called Members and Pending Invites. Both sub-tab Members would provide quick member management actions such as Search, Filtes, Adding Member and Member Invitation.

But the Members sub-tab would show a list of the Members that are part of the Team. By default if you have not invited or added any member a message. Members Tab - Members

While the sub-tab would show a list of the Pending Invites that has been sent. Member Tab - Pending Invites

Once there are members under the Team, the Owner or Manager will have the option to Set members as Managers or Demote members to member. They could also Delete a member as well as Manage a Member's info. Member Tab - Members with members

The Manage button will open a Tab that will show the member's details and let the Owner or Manager change the member's name as well as Set the member as Managers or Demote members to member. Member Tab - Manage Member

MemberSync allows quick access for a Team Owner to quickly add members via Import CSV, via Registration Link or Add Member.

Add Members via Import CSV

Owners and managers have the ability to send multiple invitations to members through CSV upload. Member Tab - CSV Invite

This action will prompt a modal where the Owner or Manager can: Teams CSV Upload

  1. Download the CSV template. Teams CSV Upload - Download template
  2. Fill out the necessary fields in the CSV Template, including First Name, Last Name, Email and Role (where "manager" or "member" are the only accepted roles, in lowercase), while team_id is optional.
info

Here is an example of a CSV File

Teams CSV Upload - Example CSV

The "team_id" field is optional, allowing it to be left empty to be applicable to any team it is being uploaded to. Alternatively, it can be filled out with the specific team_id it needs to be uploaded into. Valid Team IDs for Teams can be obtained in a few ways. One way is to find it in the URL of the page, while another method involves navigating to the Admin Side, going to WooCommerce > Membership > Teams, editing the Teams, and checking the ID in the URL.Teams CSV Upload - Upload url Teams CSV Upload - Teams url

  1. Save and upload the filled out file.
  2. Owners and Managers can choose to exclude users who are already members. Teams CSV Upload - Ignore users who are already members
  3. Owners and Admins also have the ability to control whether Members that are added on the CSV are Automatically uploaded as Members or they will get an Invite email which members have to accept. Teams CSV Upload - Import Behavior
info

The default behaivior of the Teams CSV Upload can be set on the Admin side on Settings > MemberSync > Settings > Front-end CSV members import behavior for non Owner and Admins

  1. A Registration Link could be sent to users if Owners want to use that instead to invite them. You just have to click the Invite Link button found on the right. Member Tab - Link Invite
  2. This will open a modal where an Owner can either copy the link for sending or regenerate the link if Owners prefer Member Tab - Link Invite Modal
  3. Owners now have the choice as to what medium they want to send the link to their Members
  4. Once a Member has opened the link they will be shown either a registration form or if they already have an account and they are just getting invited to another Team then they could just directly login. Member Tab - Link Invite - Registration
tip

Owners have the option to change the Registration privacy policy through the Admin side by going through WooCommerce > Settings > Account & Privacy > Registration privacy policy setting.

  1. After successful registration, the invitee should automatically be logged in and redirected to the default or a custom path Member Tab - Link Invite - Successful Registration
tip

Custom redirection path can be achieved by adding the code below to the functions.php and changing the home_url to your custom path. The code uses the Invitation Filters called wc_memberships_for_teams_join_team_redirect_to for the redirection.

/**
* Redirect link when you join the team
*/
function custom_team_join_redirect( $redirect_to ){
$redirect_to = home_url('/group-dashboard/');

return $redirect_to;
};

add_filter('wc_memberships_for_teams_join_team_redirect_to', 'custom_team_join_redirect', 9999, 1);
  1. The invitee should now have access to the course/s Member Tab - Link Invite - Access to Courses
  2. They could also have access to the Group if the Product is Synced to a Group Via MemberSync or done Manually Member Tab - Link Invite - Group Access

Add Members

Its possible to Add Members from different parts of MemberSync such as via the Add Members button on the cards shown here or through the Home Tab's Add Member button Member Tab - Add Member or through Members Tab's Member Tab - Add Member

But which ever way you chose to Add Member, it would always open the same modal below. Where the Owner or Manager can fill out the form and have the option to add more.
Add Member Modal

An Admin will have a choice to either Automatically add after submitting the form or to Send an invite email first that Members have to accept. The default of this feature for non-Admin role could be handled through the MemberSync's Front-end CSV members import behavior on the Setting page.

Team Settings Tab

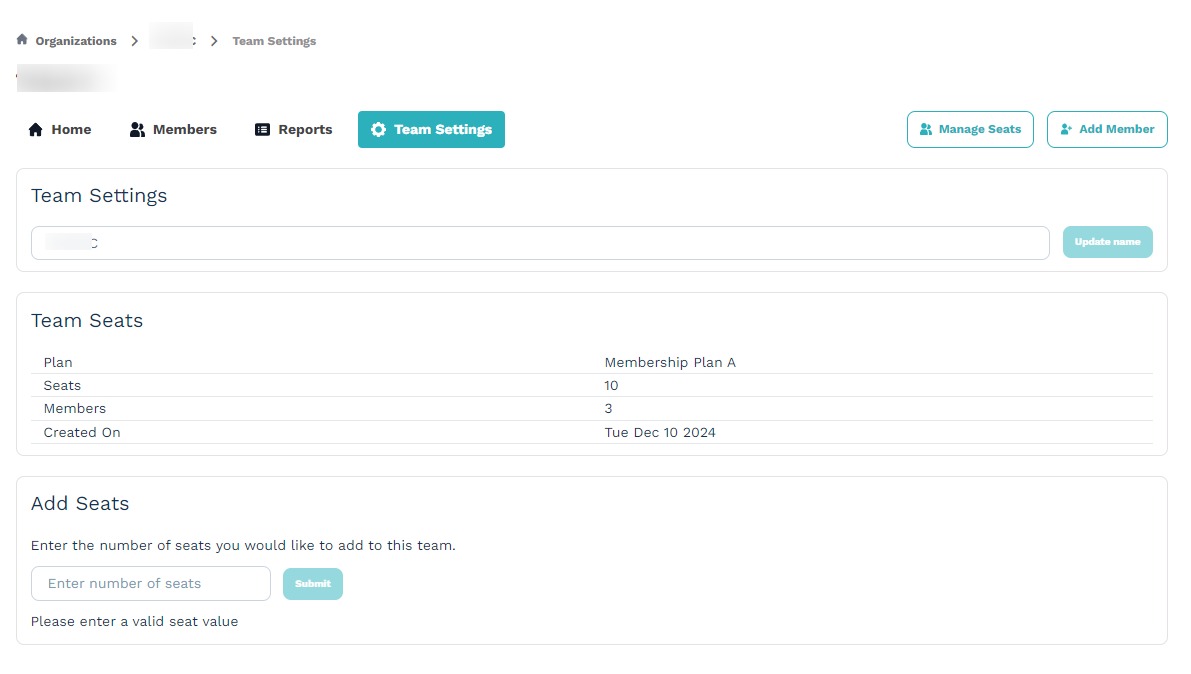
The Teams Settings tab is exclusively accessible to Managers and Owners, offering direct management options that is divided into three panels. The first panel allows for renaming a Team if you prefer. The second provides Team Seats details such as the Membership Plan associated with the Team, the number of Seats available, the number of Members that is currently enrolled and lastly the date that the team is created. The third panel is for Adding additional Seats. Team Settings Tab